/Writing
Part 2 of 3 · Homelab Kubernetes Cluster
Designing the lab: hardware, rack and power
· 10 min read
In the first post I explained why I’m building a bare-metal Kubernetes cluster. Before I get to installing anything, this one covers the physical layer: which machines, how much memory goes where, and how it all ended up in a 10-inch rack on a shelf in my office.
None of this is glamorous. But in a homelab the hardware decisions are the ones you live with longest — and a couple of mine needed undoing before the cluster ever ran a pod.
Choosing the nodes
I looked at the usual suspects: Lenovo and Dell business mini PCs, and Raspberry Pis. Honestly, any of them would have done the job, and plenty of people run happy clusters on a mix of all three.
I settled on the HP EliteDesk 800 G4 Mini for four reasons:
- Build quality. These are corporate machines designed to run all day, every day, for years. Second-hand, they’re cheap and still solid.
- Storage flexibility. Each unit has two M.2 NVMe slots plus a 2.5-inch SATA bay. That gives me room to separate the operating system from data disks later — which matters once distributed storage arrives. (That’s a post of its own.)
- Flex IO. HP’s Flex IO port takes add-on modules, including an extra network port such as 2.5GbE. I’m not using it yet, but it’s a nice upgrade path to have.
- Intel vPro. Every node has an i5-8500 with vPro, which brings Intel AMT: remote power control and a remote screen, built into the hardware. With no monitor anywhere near the rack, that turned out to be essential. More in a later post.
The bigger decision was to keep every node identical. Mixing and matching would have been cheaper in places, but I wanted to rule out a whole category of problems: different firmware, different network chips, different quirks. When something breaks, I want the hardware to be the least interesting variable. And, if I’m honest, a good deal on the first couple of units swayed it too.
The cluster is five nodes: three control planes and two workers.
Memory: where it goes and why
Most of the units arrived with a single 8GB stick. The 800 G4 Mini has two memory slots, and filling both lets the memory run in dual channel, which roughly doubles the available memory bandwidth. Second-hand 8GB DDR4 SO-DIMMs are cheap, so the first job was pairing every node up.
From there, the split follows the workload:
| Node | Role | Memory |
|---|---|---|
| CP1–CP3 | Control plane | 16GB (2 × 8GB) |
| WN1 | Worker | 32GB (2 × 16GB) |
| WN2 | Worker | 24GB (16GB + 8GB) |
Control planes get 16GB, which is plenty. They run the Kubernetes API server, the scheduler, the controller manager and etcd — important, but not memory-hungry at this scale.
Workers get as much as I can give them, because that’s where the applications actually run. WN2’s mismatched pair is worth a note: Intel’s Flex Memory mode runs the matched portion (8GB + 8GB) in dual channel and the remainder in single channel. Not perfect, but a perfectly reasonable trade for the price.
Preparing the nodes
Second-hand hardware has an unknown history, so nothing went into the rack until I’d checked it. Two jobs mattered most: proving the memory was good, and giving every CPU fresh thermal paste.
Memory testing
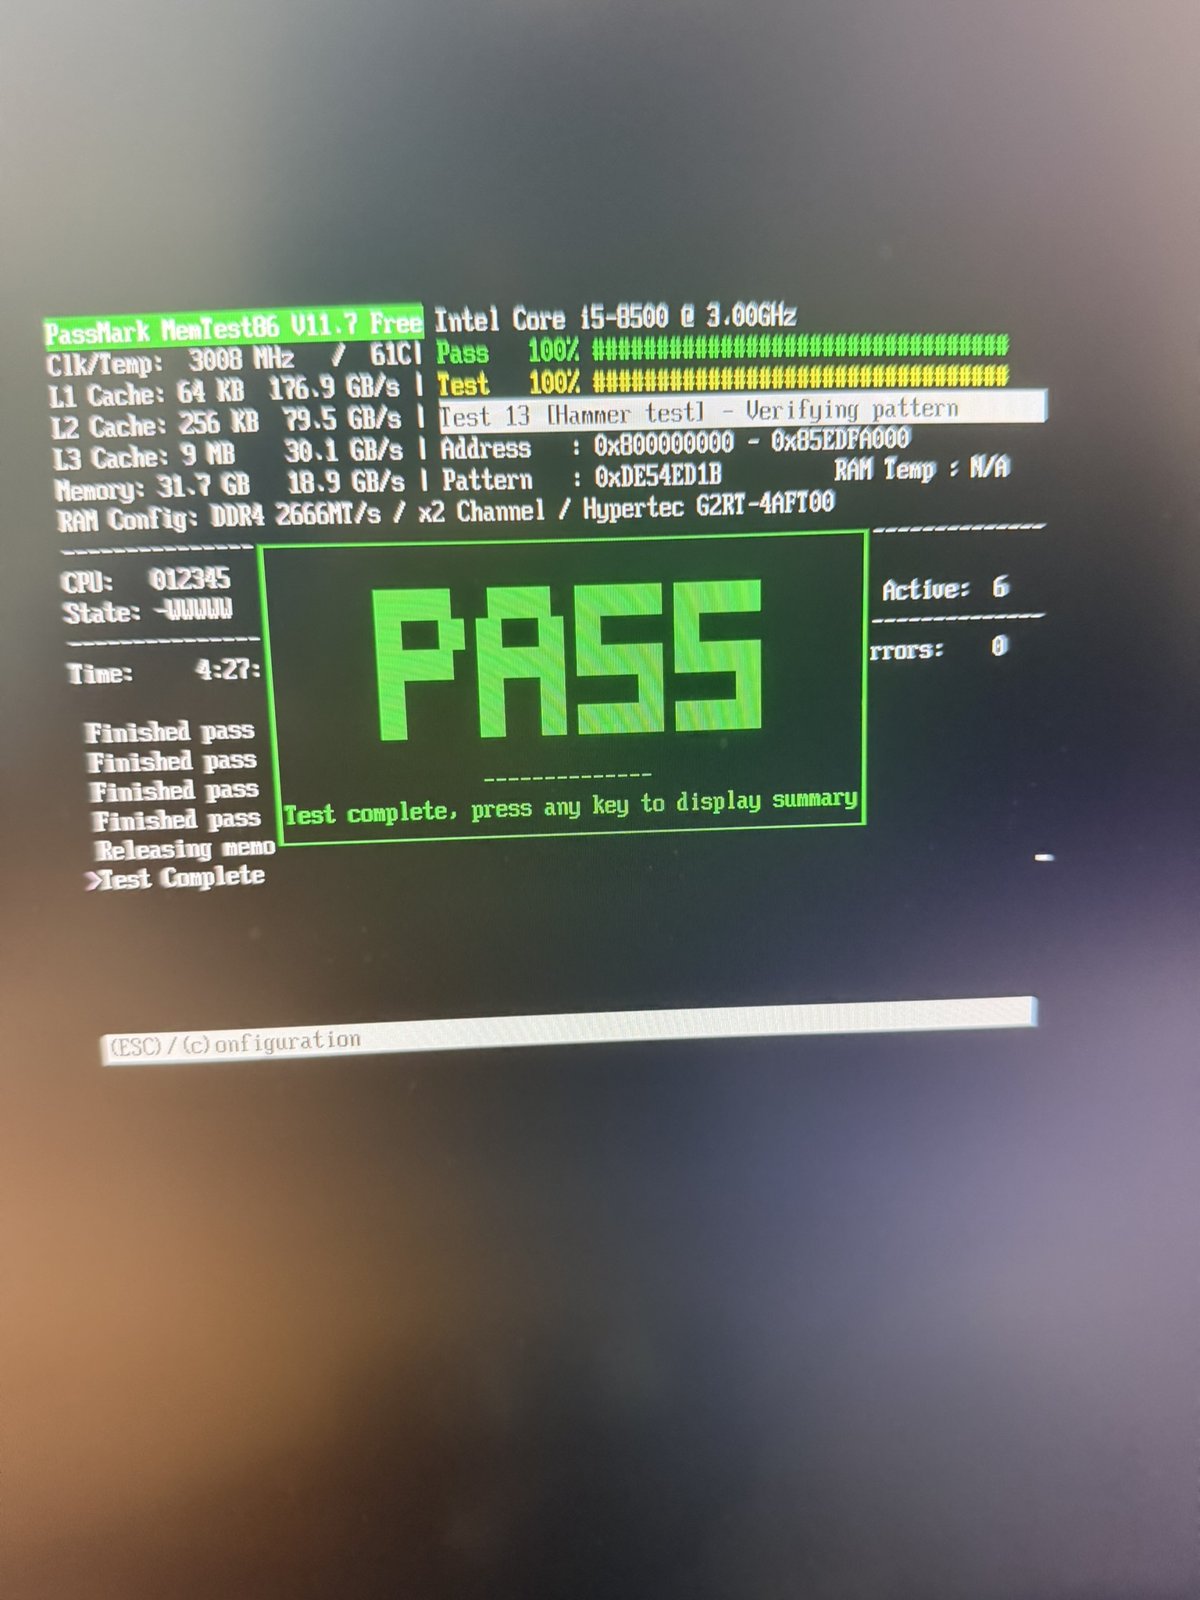
Every node got a full run of MemTest86 with its final memory installed, before anything else. Faulty memory is one of the nastiest problems to chase later: it shows up as random crashes, corrupted data or flaky containers, and it can look like almost anything else. Ruling it out at the start is cheap insurance, especially before you trust a node with etcd.
All five passed with zero errors. The screenshot below is just one of them, WN1 with its 32GB. It also confirms the dual-channel point from earlier: x2 Channel on the RAM Config line.
Fresh thermal paste
These are second-hand machines from around 2018, and they’ve probably had a hard life. The sellers had refurbished most of them, but I wanted to know exactly what was under the hood. With the cluster not yet live, this was the easiest time to do it, so I opened every EliteDesk, cleaned off the old paste and applied fresh ARCTIC MX-7, my go-to paste.
Most of them turned out to be in decent shape. One wasn’t: its paste was dry, cracked and patchy on both the CPU and the heatsink.
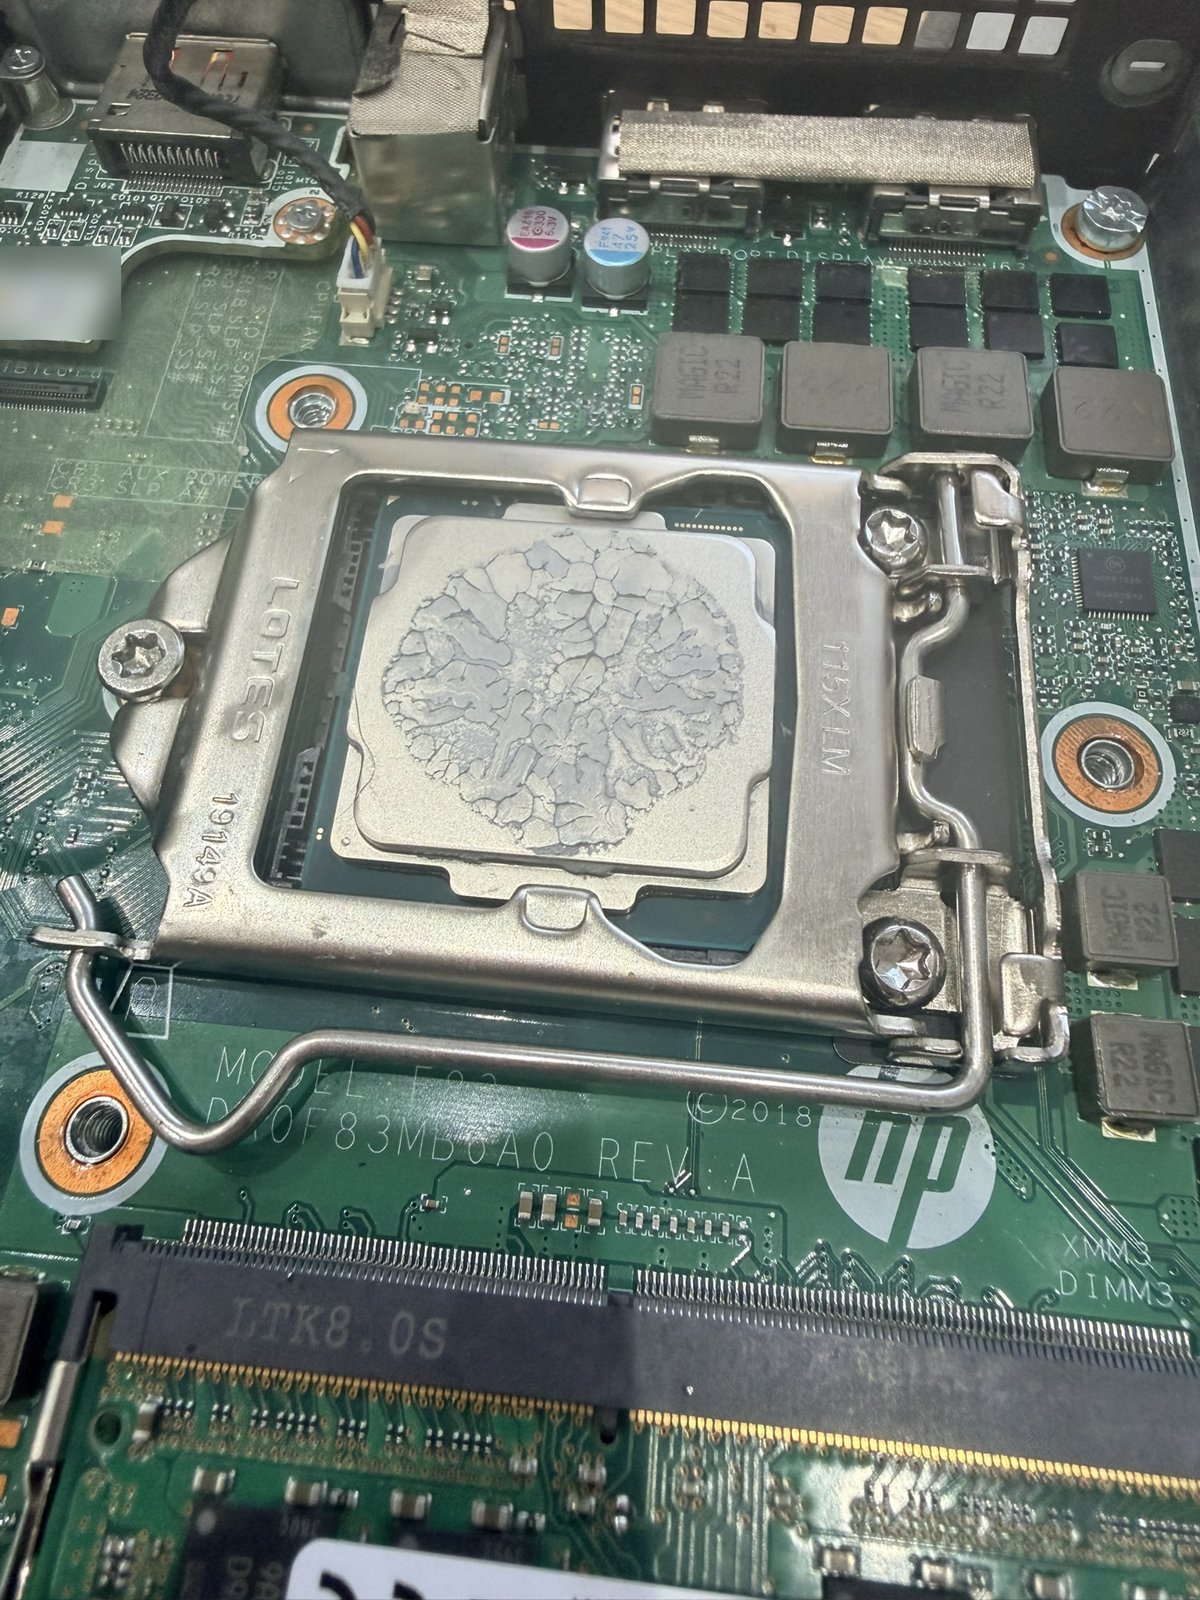
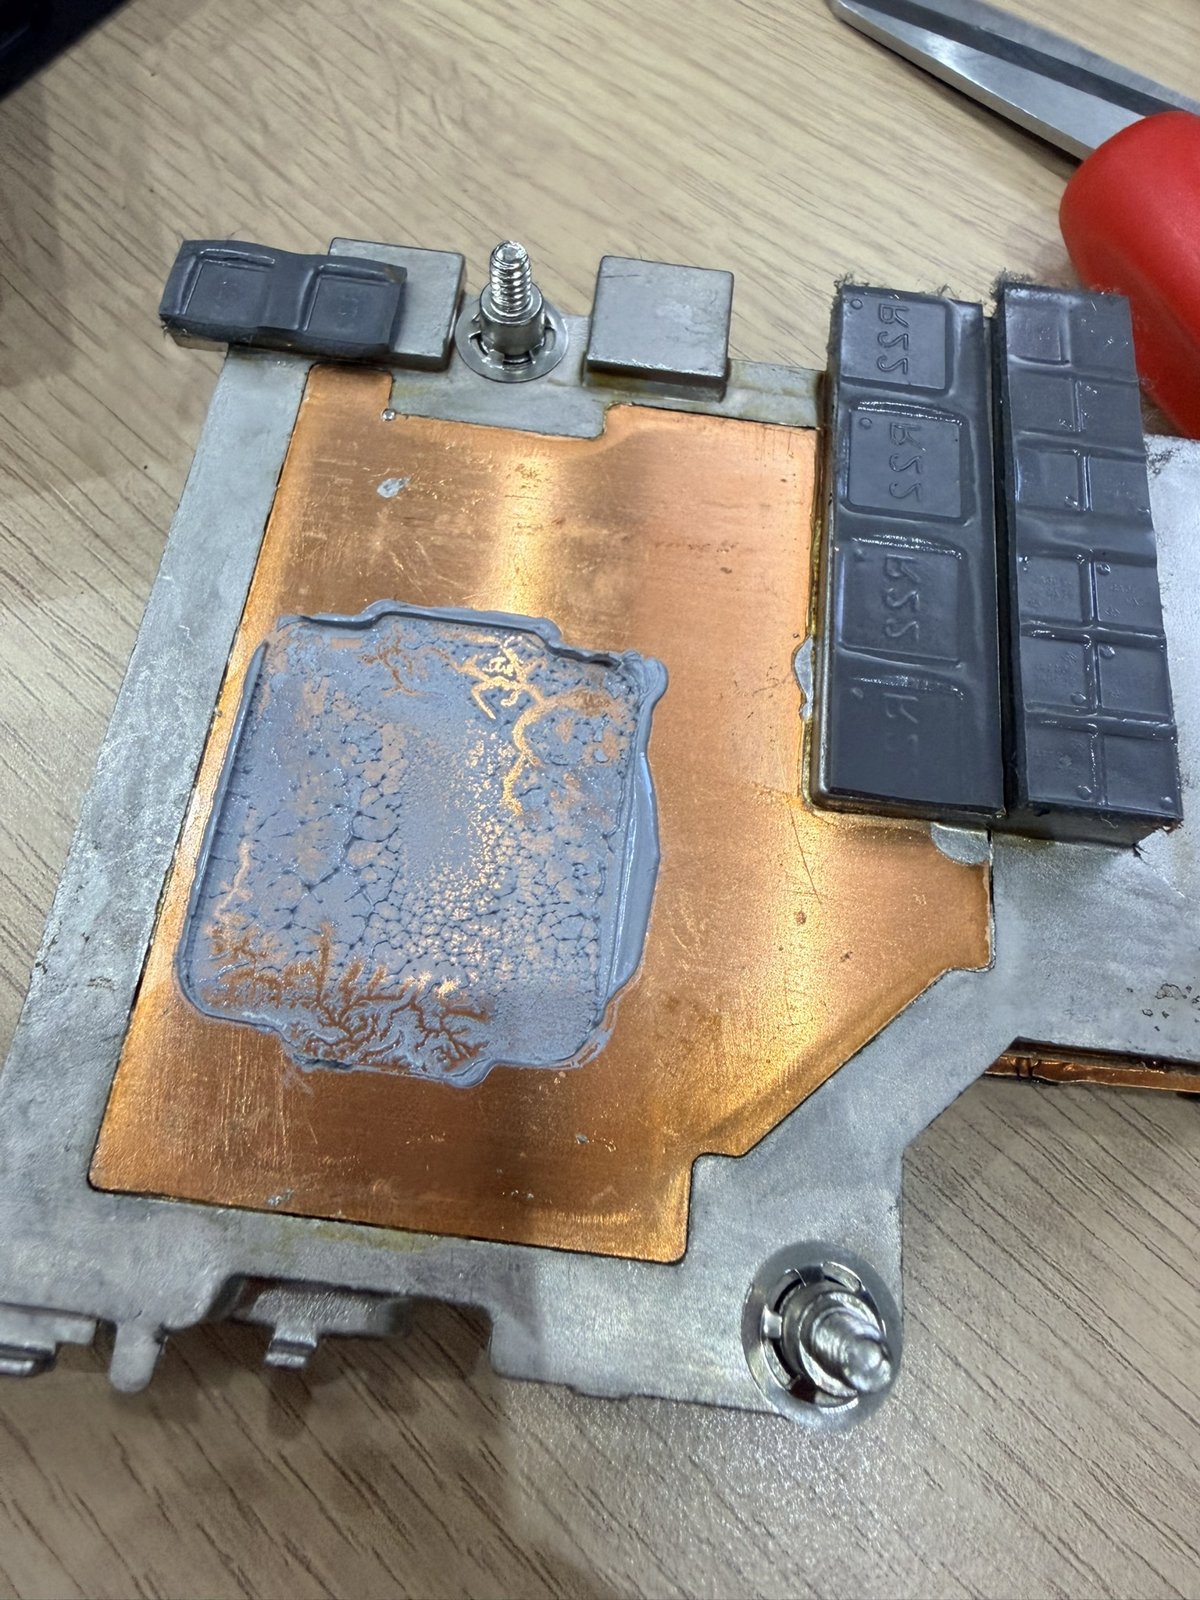
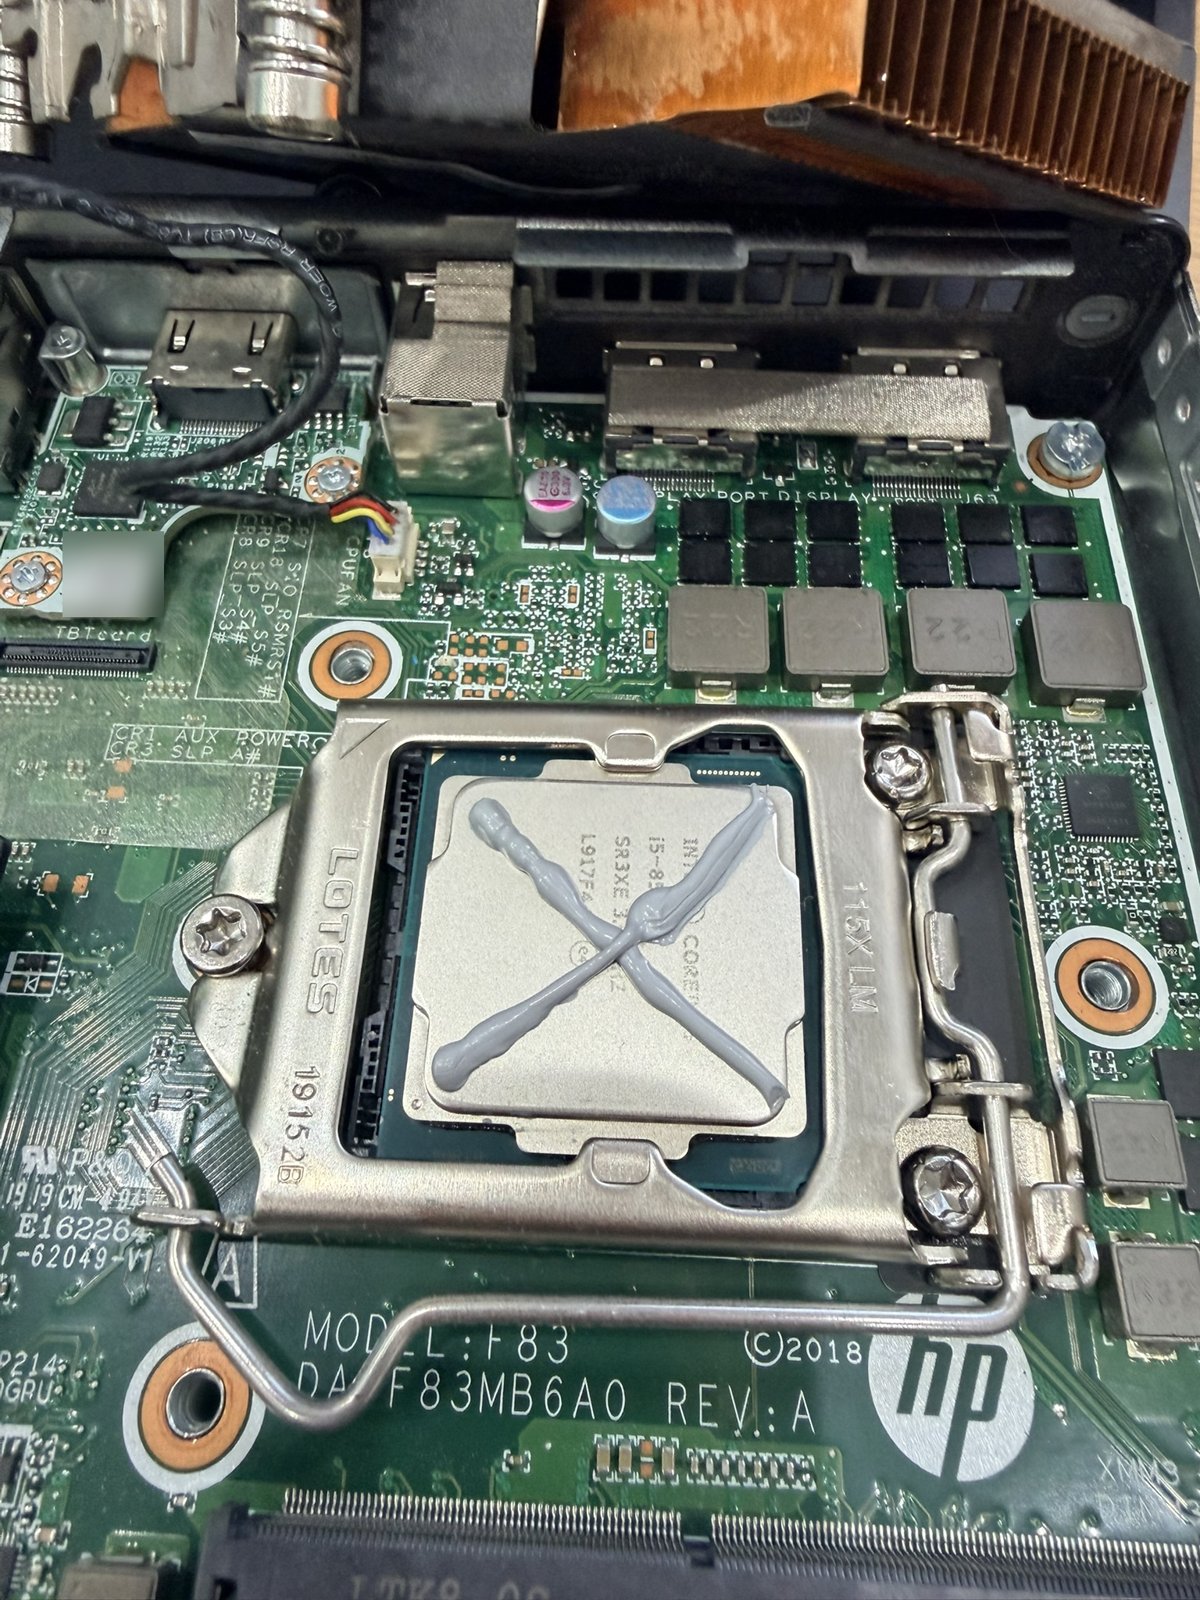
I didn’t measure temperatures before and after. This wasn’t a performance experiment. In a case this small, failed paste means a hotter CPU that throttles sooner, and fresh paste costs very little. Mostly, it was peace of mind: every node now starts from a known state.
The rack
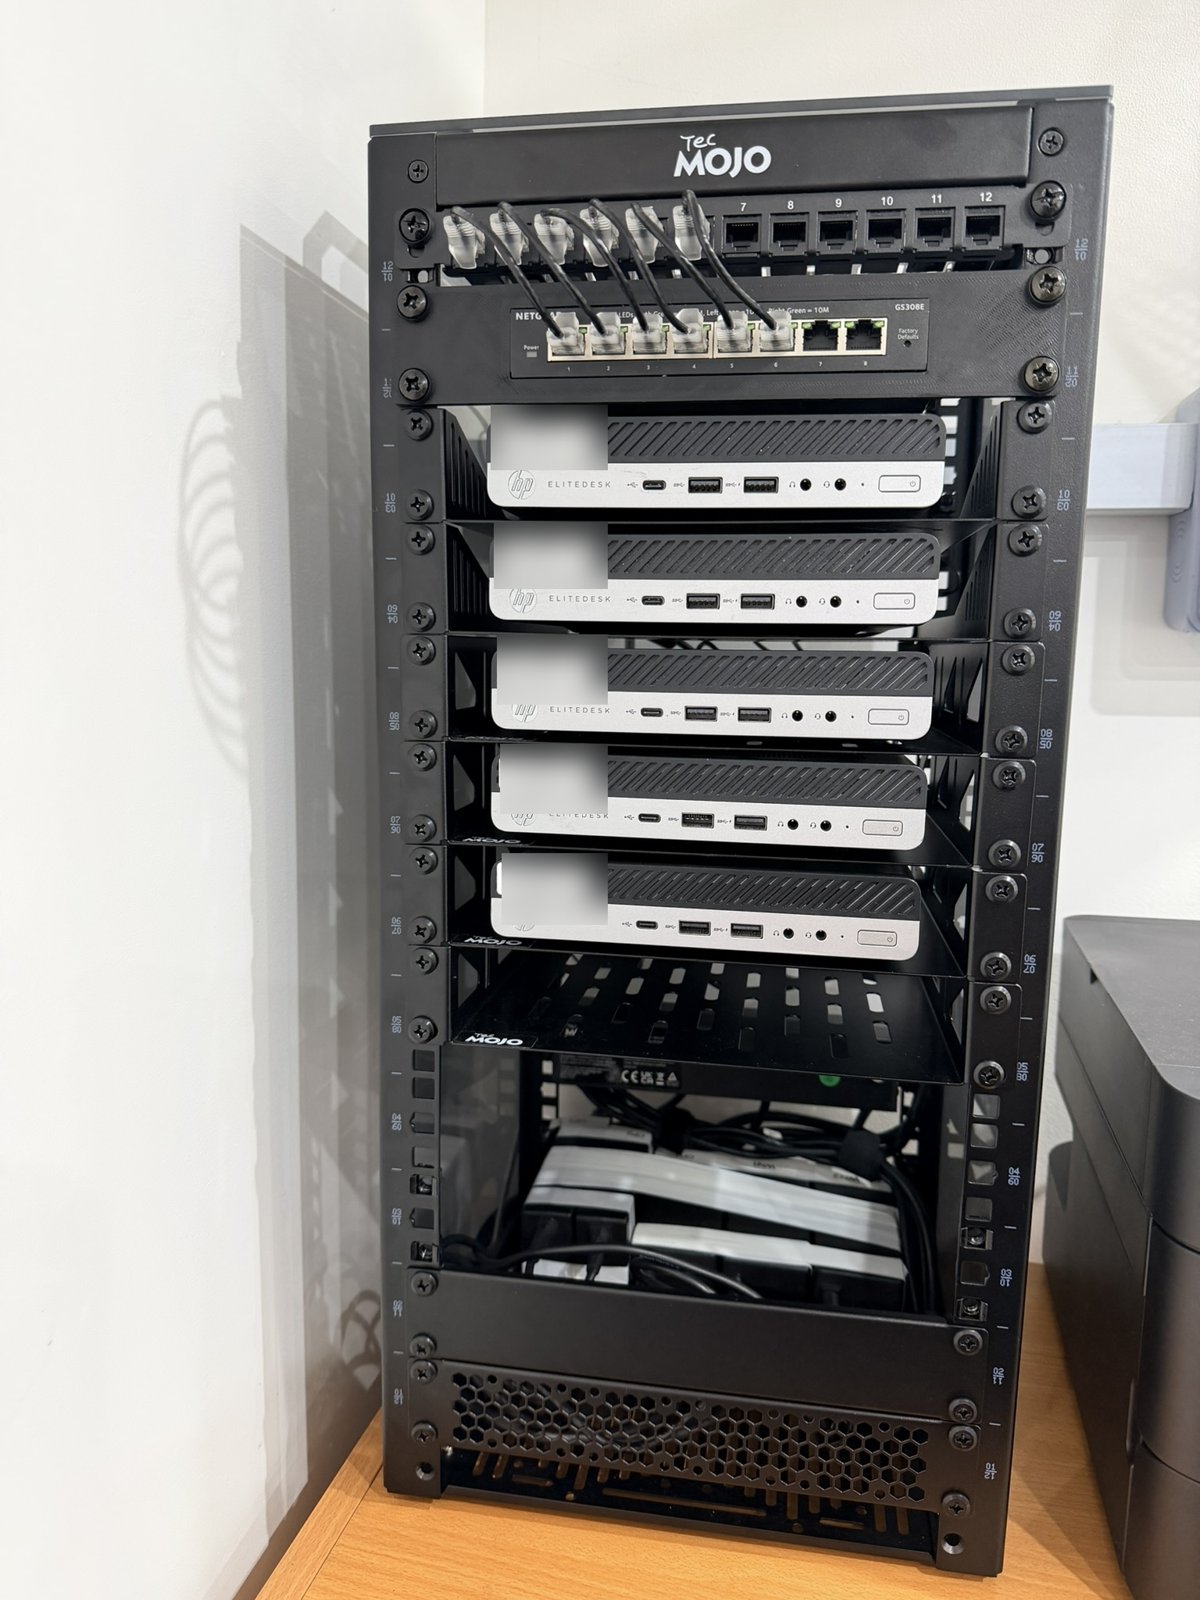
I went with a 10-inch, 12U rack, which is small enough for a shelf and big enough for five mini PCs, a switch, the power and room to grow. In this size the choice is surprisingly narrow. The two names that kept coming up were GeeekPi’s DeskPi range (the T2 12U is very popular) and Tec Mojo.
I chose Tec Mojo, mainly on price and value — and partly for nostalgia. It uses cage nuts rather than pre-drilled, pre-threaded holes, just like the full-size racks I grew up working with. Cage nuts are fiddlier, but they’re also more flexible: you can put a shelf exactly where you want it. I haven’t owned a DeskPi, so I can’t offer a fair comparison, but I’m very happy with the Tec Mojo’s build quality.
The EliteDesks sit on rack shelves. A couple came with the rack, and I bought four more.
Layout
The rack has two faces, and I treat them differently.
Front, top to bottom:
- Patch panel
- Network switch — a Netgear managed switch in a 3D-printed 10-inch mount (an eBay find)
- CP1, CP2, CP3 — the control planes
- WN1, WN2 — the workers, with space left below
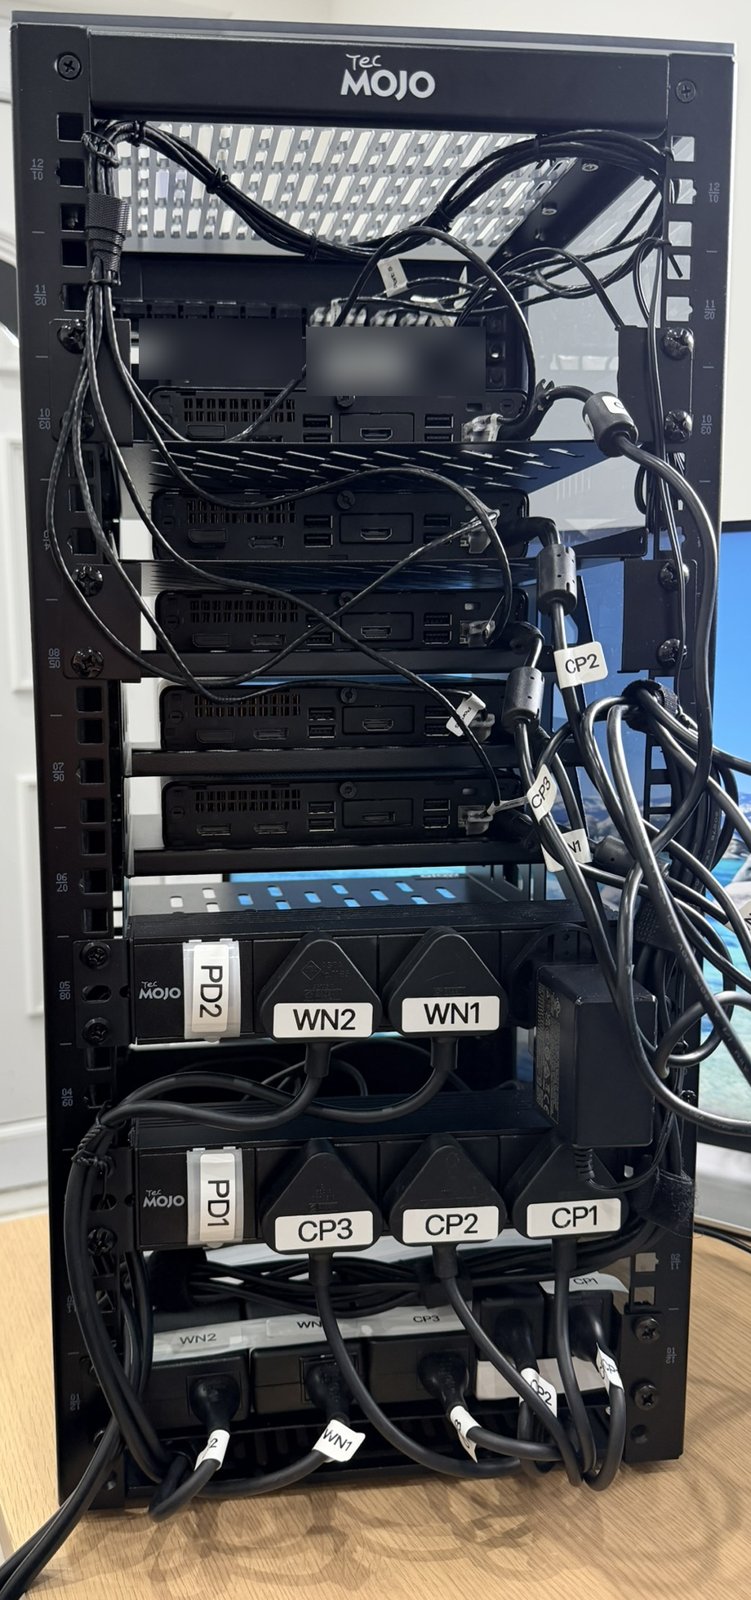
Rear, lower section:
- The EliteDesk power bricks live at the very bottom.
- Two power distribution units (PDUs) sit just above them.
Keeping the control planes together and in order isn’t a technical requirement, but it means that when I’m standing in front of the rack, the physical layout matches the cluster in my head. CP1 is always on top.
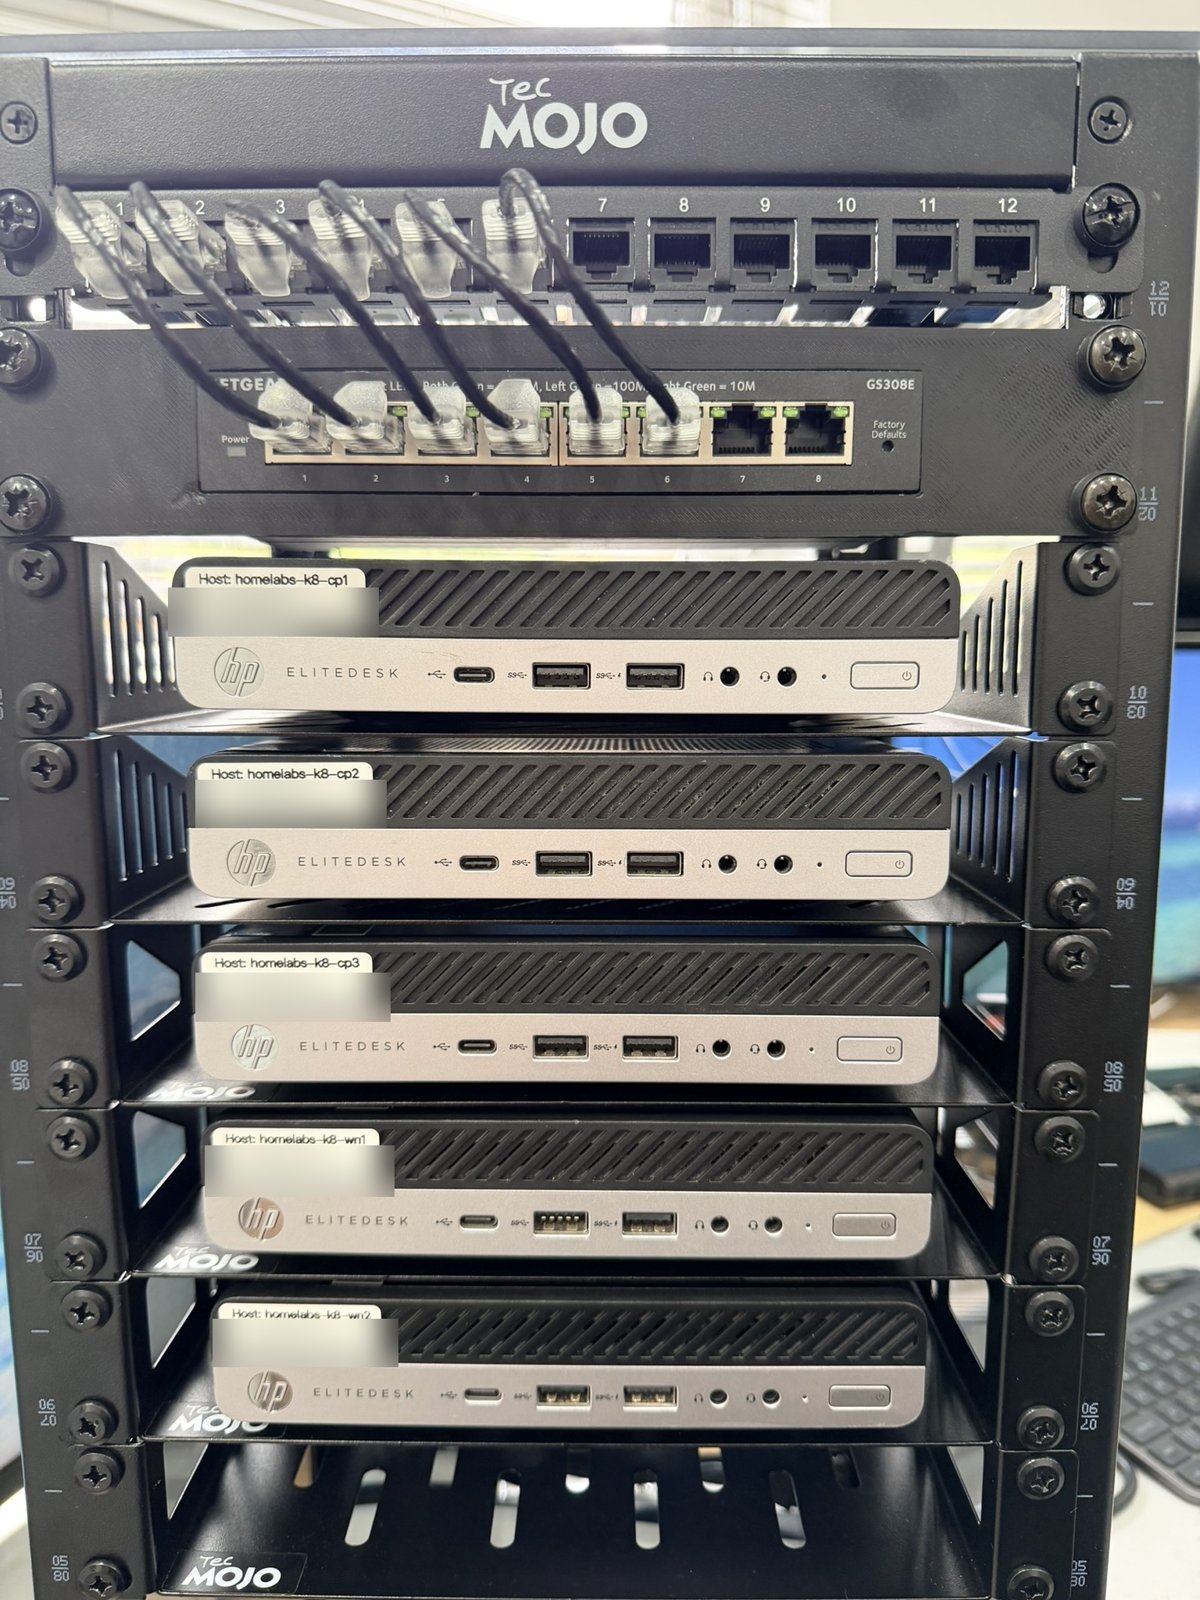
Labels turned out to be one of the best things I did. Every node has a front label with its hostname. Every power lead is labelled at both ends, and so is every PDU socket. The PDUs are labelled too: the control planes are on PD1 and the workers on PD2. I made them all with a Nelko P21 label maker from Amazon, which did the job perfectly. When you’re reaching round the back of a rack with no monitor, you want to know exactly which plug you’re about to pull.
Power
There’s no UPS — yet. It’s on the list, but it’s a real cost, and I’d rather understand the cluster’s actual power draw first. I’ll measure that properly and write it up.
What I did buy was a pair of Tec Mojo PDUs. Each EliteDesk has an external power brick, and five bricks plus a switch is a lot of plugs. Racking the PDUs keeps every adapter inside the rack, so the only thing leaving it is a single power lead.
Cabling
For network cables I used Tec Mojo’s thin Cat6 patch cables in two lengths: six 20cm cables and ten 50cm cables. Thin cables are the single biggest difference between a tidy mini rack and a bird’s nest, because they bend tightly and don’t fight each other.
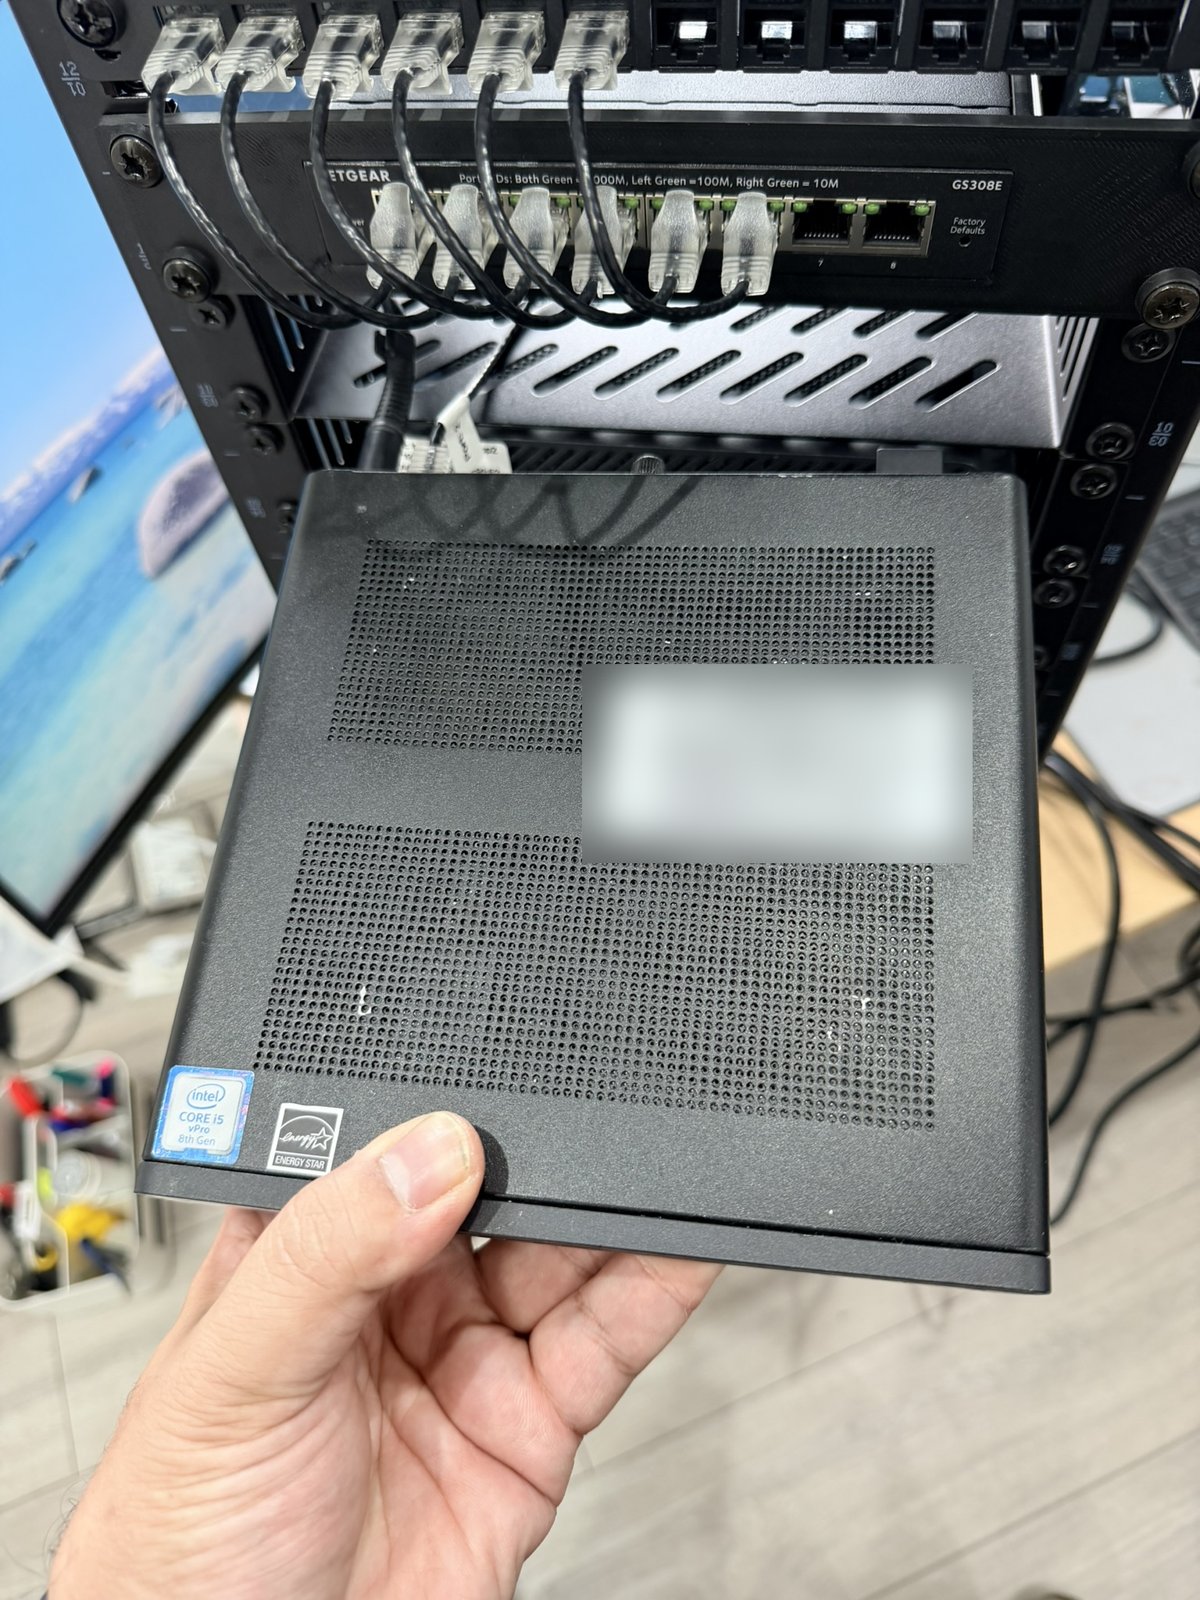
Power cabling is held together with cable ties and Velcro. The one rule I gave myself: leave enough slack to slide any EliteDesk out of the front without unplugging anything else. Every node will need servicing at some point — memory, disks, the odd firmware issue — and I don’t want maintenance on one node to risk another.
Where it lives
The rack sits on a corner shelf in my office. There’s no monitor, no keyboard and not much room to work around it. That constraint shaped more decisions than anything else: if a node can’t be managed, serviced and recovered easily, it’ll become a chore. Hence vPro on every node, front-access servicing, and slack in the cables.
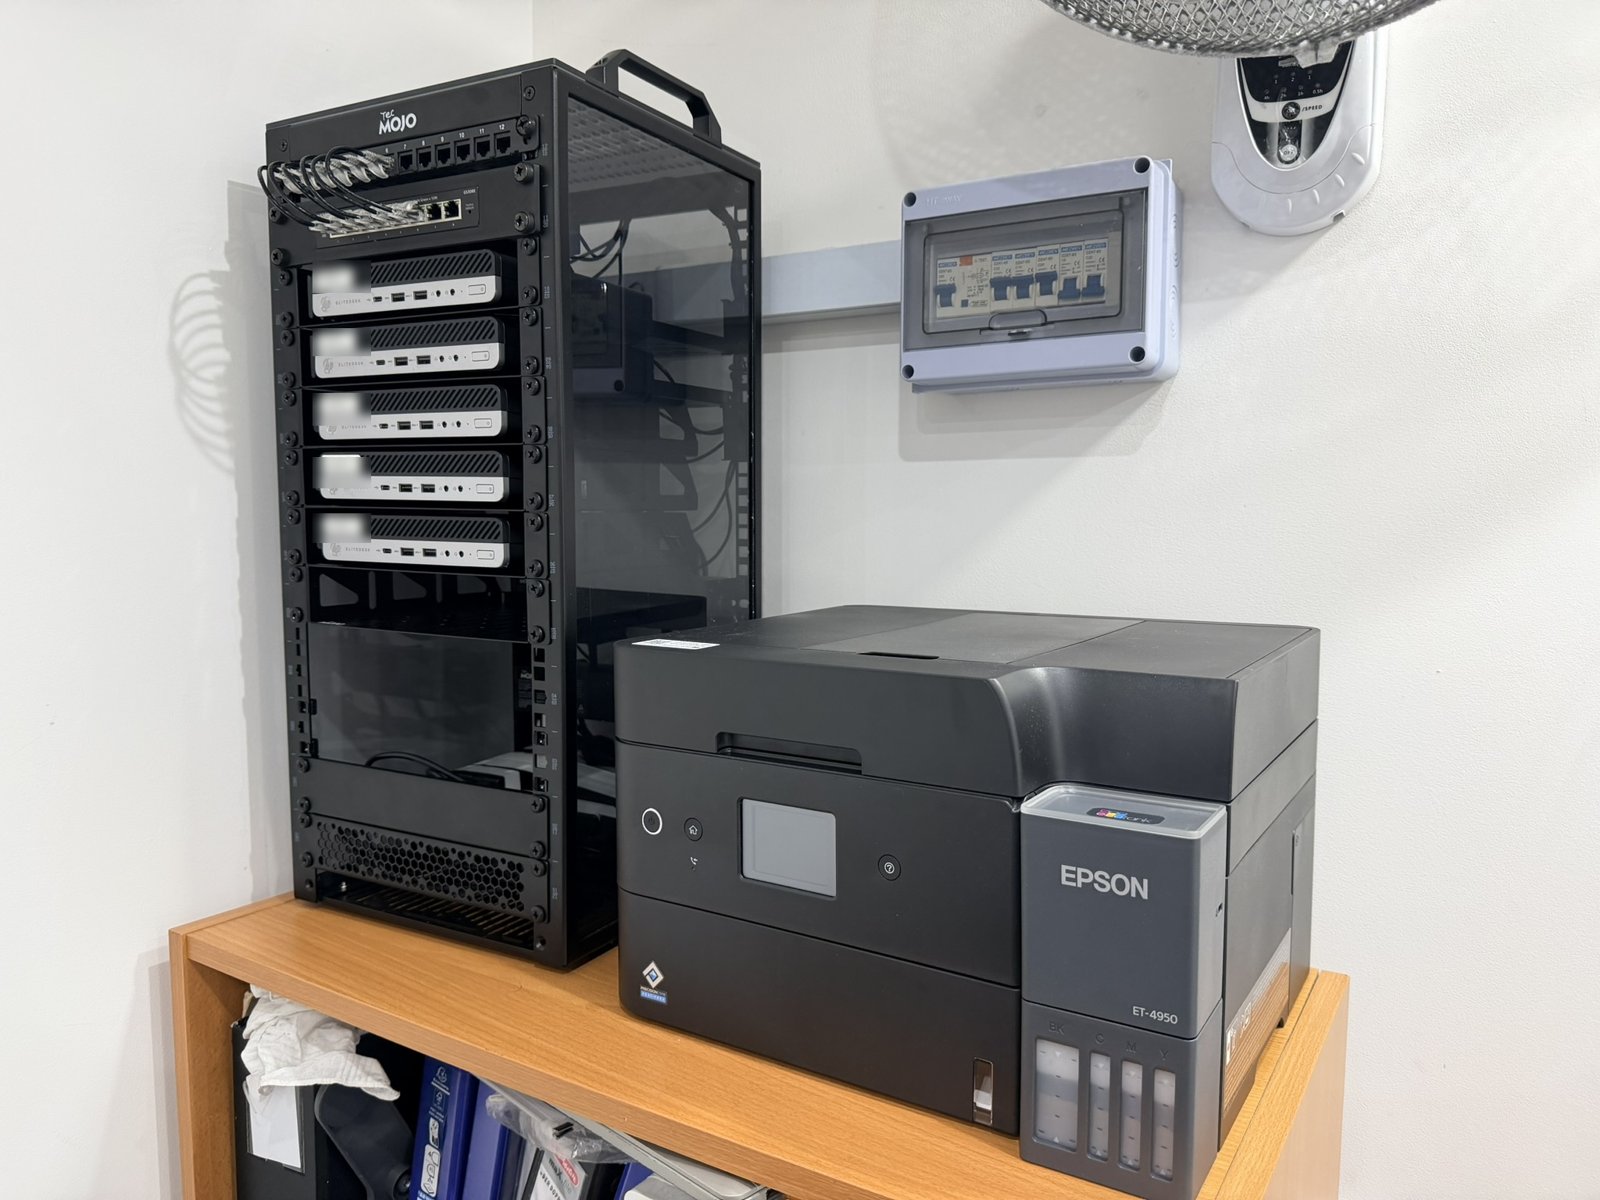
What went wrong
The PDUs that didn’t fit
My first layout put the PDUs at the rear, at the top. It looked logical on paper. In practice, the rack isn’t very deep, and the PDUs clashed with the switch, the patch panel and the EliteDesks themselves. Everything had to come out, and the power moved to the bottom section, where it lives now.
Lesson: in a shallow rack, front and rear aren’t independent. Plan both faces together.
The BIOS update that bricked a node
Before installing anything, I checked every machine: hardware, BIOS settings, firmware versions, memory and storage. The goal was a known-good baseline before building anything highly available on top.
All five booted into their old Windows installs. Four of them flagged a real-time clock power-loss warning, which I noted and moved on from. That one came back to bite me later, during a failover, and it gets its own write-up.
One machine, though, showed a different and more serious warning on every start-up:
There is a problem with the HP Endpoint Security Controller on the unit. Please contact HP to have the unit serviced.
After a pause of around 15 seconds it carried on booting as normal. It was also running a much older BIOS than the others (02.09.01, against 02.33.00 on the rest). I was troubleshooting with an AI assistant at the time, and its suggestion was to update the BIOS: old firmware might be the cause, and updating while Windows was still installed was easier than doing it after Talos. That sounded reasonable, so I ran HP’s firmware update tool from Windows.
It never came back. No display, no keyboard, no BIOS screen. Just the power light blinking a repeating code: five long red flashes, then two short white ones. As far as I could tell, that pointed at the embedded controller’s firmware rather than the disk or the operating system.
I let it sit for 15 minutes in case it was still recovering itself. Then I tried the power button, which no longer turned it off. Next I tried a full power drain, with the adapter unplugged and the power button held. Then a CMOS reset with the coin-cell battery removed. Every time the power lead went back in, the machine went straight into the same blink code without anyone touching the button.
I stopped there on purpose. I didn’t press unidentified buttons on the motherboard, try random recovery key combinations or flash firmware images I couldn’t verify. A guess at that stage would only have added a second fault on top of the first.
In the end I bought another EliteDesk to take its place, and the bricked one is on the shelf. It may well be a lost cause, but I haven’t given up on it. I’ll come back to it with more troubleshooting when I have the time. If it really does need a new motherboard, that’s more than the machine is worth, so it’ll become a spares donor for the rest of the cluster. And a permanent reminder not to do whatever an AI tells you.
I don’t know the root cause, and I won’t pretend to. The warning hints that something was already wrong with the machine’s security controller, and the update may have exposed it. But the only thing I can prove is the timing.
The lessons I took from it:
- Working isn’t the same as healthy. A machine that boots Windows can still have a serious firmware problem.
- Don’t wave through warnings. A warning that doesn’t stop the boot still means something.
- Firmware updates aren’t ordinary updates. Understand how a machine recovers before you flash it, especially when a hardware security component is already complaining.
- Treat AI advice like any other advice. The suggestion was plausible, but it skipped over the risk. Checking it was my job.
There’s a lot more to this one: HP Sure Start, what the embedded controller actually does, and why a CMOS reset couldn’t fix it. It’ll get its own post.
A dead-on-arrival disk
One of the replacement NVMe drives for WN2 arrived faulty and went straight back. That’s the reality of buying second-hand: most of it is fine, some of it isn’t, and it pays to test everything before it goes in the rack.
What’s next
With the hardware racked and powered, the next layer is the network: IP addressing, DHCP reservations, the managed switch, and how the cluster fits into a normal home network. After that, remote management — how I look after a rack with no monitor — and then, finally, installing Talos.
Full hardware list → /projects/homelab/